
One Room Challenge, Week 1

I’ve decided to participate in the One Room Challenge as a guest participant this year! Due Covid-19 pushing back the start date it is coinciding with our powder room renovation and it seemed appropriate for me get involved. It also may give me the right amount of fire under my feet to get this project completed in an appropriate amount of time!
With that said, let’s start the conversation and give you a little background about the room we’re remodeling. The powder room is set at the back of the house, backed up to our recently remodeled scullery, they share the same plumbing wall. The other room the powder is connected to, is the sunroom, which I’d like to turn into a mudroom since that room also has an exterior door. The powder room is small, a total of 4’ 10 - 1/2” wide by 5’ 4 - 1/2” long. The current layout is fine, the only subtle change we wanted to make was to shift the toilet closer to the wall to allow more room for the new vanity.

The Real Estate Listing of the BEFORE
With the powder room sharing a wall with the scullery, it made sense for us to demo both rooms at the same time. We gutted them back in July of 2019, which means we were left with an unusable powder room for almost an entire year! Because that is the only bathroom on the main floor, this also means that we have not entertained in the same amount of time! You may be wondering, why not let guests use the upstairs bathroom? Well that bathroom is one that should live on the feed of @pleasehatethesethings and is awaiting its own renovation next year.
The reason why we’ve waited this long to start the powder room is because we wanted to complete the scullery before we moved on to the next room. As a result, I’ve had plenty of time to design the space and accumulate the materials and objects needed to complete this remodel. In fact the only missing component is the countertop and backsplash which will be a remnant from a stone yard.
Since I’m new to this ORC thing, I’m not entirely sure how this process works, but I am pretty sure I’ve already divulged too much on our instagram feed, sharing the process of where we currently are with the remodel. But I can try to play the game and each week delve deeper into the process. And believe me there is plenty more to share as we continue to finish this project.
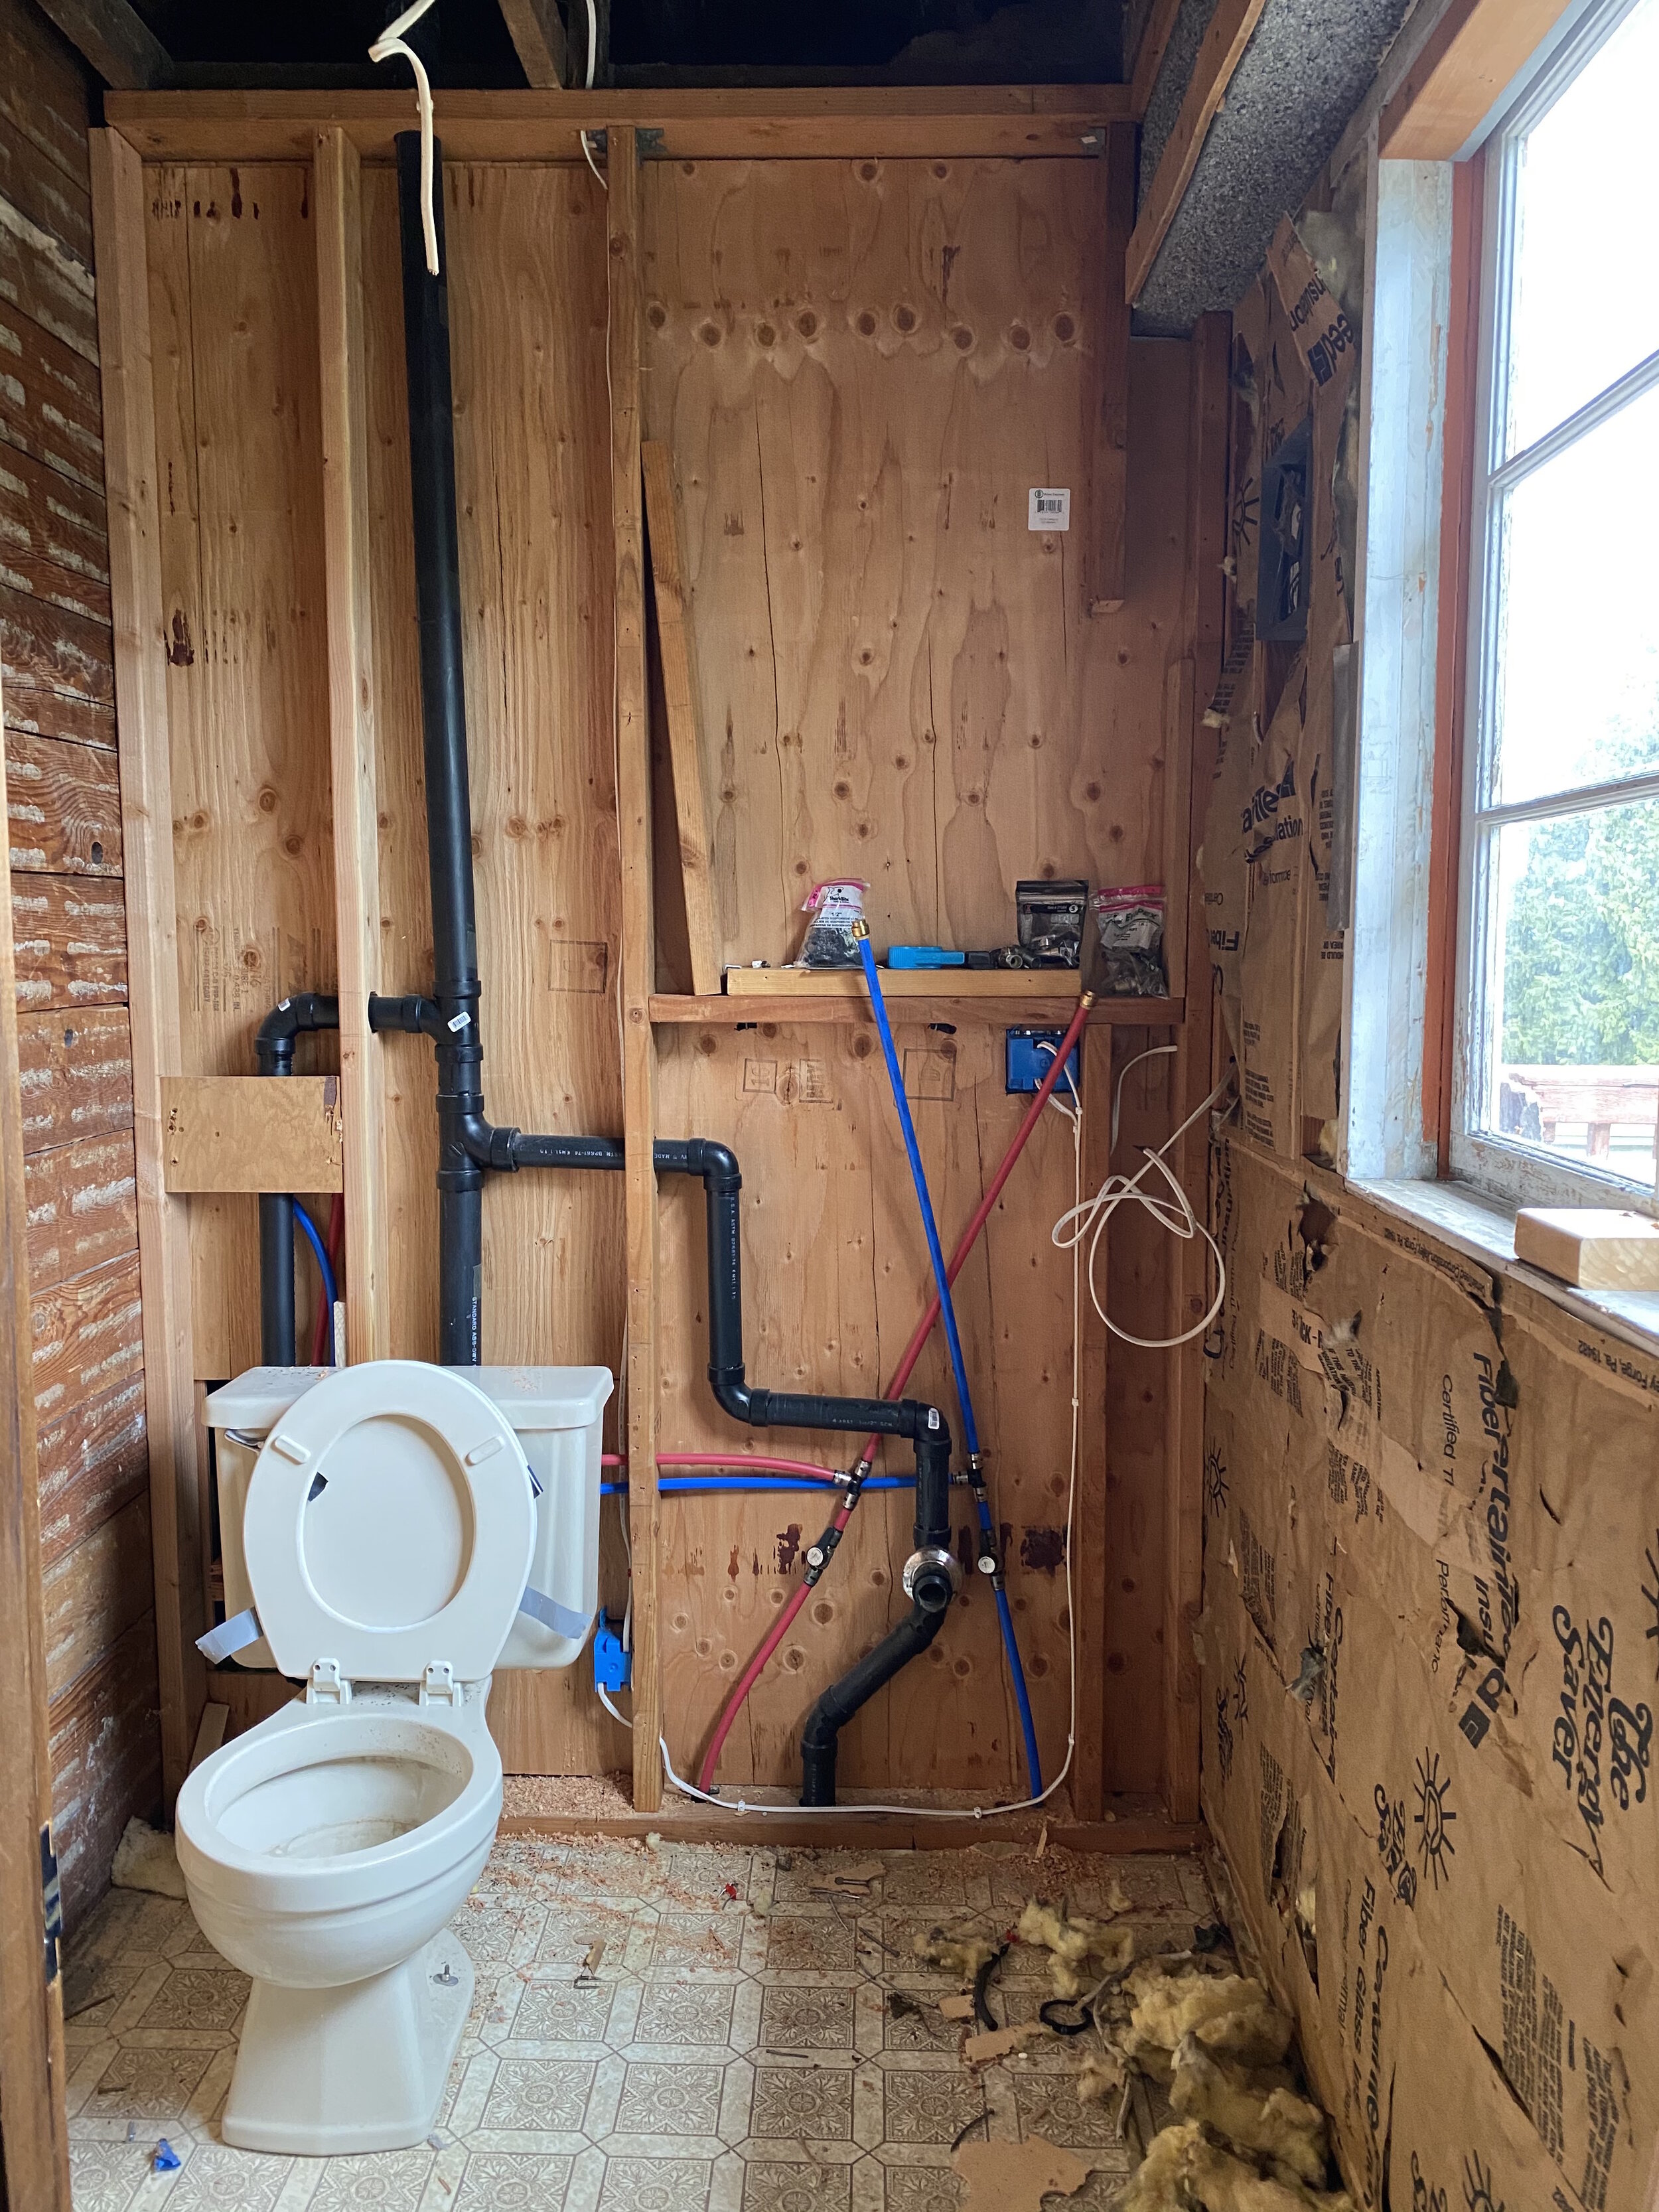
The Powder Room Post Demolition
Design Challenges
First up, let’s discuss the challenges this room has posed for us. This room is small, as mentioned which is typical of powder rooms, but initially I would have loved to install a shower in this space. I tried every configuration possible, even stealing square footage from the scullery and realized it wasn’t going to work. So that plan was abandoned pretty early on. The small size made it impossible to move the fixtures around, so the current floor plan in the current footprint is actually the best layout. The toilet is not directly in front of the door, which is a definitely win. We did however, decide to shift the toilet over a little to allow for more room for the vanity.
Next, the room originally was a part of the house’s original back porch and was covered in that lovely render called pebbledash. I’ve discussed pebbledash in the past when I wrote about the scullery [here]. These two rooms were carved out of the original porch, so both spaces had the pebbledash to begin with. The pebbledash definitely had to go. Thankfully Jack found a rhythm while removing it in the scullery and just blasted through the powder room in the same weekend. Otherwise, the next greatest challenge for us was to save money and keep the budget relatively low, while still making this room very high-end. My vision is for this space to be a jewel box and to feel sexy and fun for someday, when we are able to have guests over again. Knowing full well that I have expensive taste and do not want to scrimp on the quality, we have to think of ways to accomplish my goals while still remaining within budget.
Design Inspiration and Direction
Keeping the jewel box concept in mind, I knew immediately that I’d want to do a deep, moody color in this room and for it to be in the world of jewel tones. I also would like to consider the existing architecture within the home, and to use age appropriate materials and fixtures. And lastly, I’d love to add a fun, energetic wallpaper to introduce a sense of playfulness.

Design by Reath Design
My first design inspiration came from this bathroom designed by Reath Design in their Berkley Craftsman project. Seeing how they used a deep rich, jewel toned color, and beadboard within this bathroom perfectly illustrated some of my initial concepts. They also have installed marble hexagon floor tiles in this room, another element I’d like incorporate. Knowing that this room lives within a Craftsman home with a lot of similar original design details to my home, sealed the deal for me that my general design direction was good, and would definitely work!

Design by House Of Brinson
The next major inspiration image comes from past One Room Challenge space designed by House of Brinson. Their first floor bathroom oozes with character and mood, similar to what I’d love to express in my home. The floor tiles are a dream, but I think we’re going to save those for our upstairs bathroom. The dark walls, wainscoting and the mahogany toilet seat is actually very much inline with my vision. Also, they used an antique casepiece in the room (cabinet in this case) that is along the lines of the vanity inspiration I have.

Design by Anna Braud
This last image shows a style similar to the backsplash I’m planning to have made for the vanity and sink top, but set onto an antique chest. Funny thing is I’ve known all along that I’ve wanted a wood, antique vanity for the powder room and found the one we have a few weeks after we moved into the house. I’ve been using it as a chest in our living room all this time, but now I’m so excited to finally set it in the bathroom soon!
Design Boards & Drawings
Looking a the inspiration images and the board above you can see the elements I have included in my design. I have decided for the walls to us the Farrow & Ball color, Inchyra blue. It’s a deep moody, blue green that has enough gray in it that in certain light can feel like a charcoal. It’s perfect in my opinion! The other major detail you’ll see is that we’re using tongue and groove beadboard again! When we ordered the lumbar for the scullery, we ordered enough to accomodate this room! We knew we wanted to reintroduce that design element somewhere else in the house, because it’s always good to repeat an architectural feature in a home. I mentioned this when discussing the scullery designs, but the decision to use beadboard did not come out of left field. It was used in the ceiling of the scullery and has been used in the ceiling of our front porch, and in the ceiling of all of the dormers on the exterior of the house. It clearly was intended for exterior use in 1916, but we are going to bring it indoors for these two rooms as well as the hallway down to the basement someday, and potentially in our laundry room when we build that out.
Another design similarity you’ll find with my board and the inspiration, is that I am using the hexagon marble mosaic floor tiles. Similar to what Reath did in their bathroom, however I am adding a 2” border around the room with 2” x 12” calacatta gold marble subway tiles. The toilet is very similar to House of Brinsons, however it is the budget version as theirs is Perrin & Row and we’ve found a Kohler toilet that is within our price range. I do love the mahogany toilet seat and the sanitary handles, so I’ve purchased a toilet seat and will hunt down some sanitary handles as well.
In terms of the backsplash inspiration I shared, in the next image you’ll see what I’m planning to do. I wanted a wall mounted faucet and for it to be set into a stone backsplash. My plans are to use a calacatta stone or a really beautiful soapstone. Since it is going to be a remnant, I’m hoping that will be slightly more affordable than going with a full slab. I am keeping my options slightly open knowing that I’m looking for a needle in a haystack. Fingers crossed I find what I’m looking for.

For the beadboard application, I’ve decided to follow the design styles of craftsman homes, ie our home. We’re going to make the beadboard wainscoting taller than usual wainscoting at the height of 54”. We went back and forth on the exact height because the wainscoting in our dining room is at 5’ (60”) but the ceiling height is 9’ and the ceiling height in the scullery will only be 8’. It was appropriate to lower the height of the wainscoting to account for the lower ceiling height. The height of the beadboard also would affect the interaction of the medicine cabinet, outlets, light switches and the window frame, we wanted to make sure these elements would interrupt the beadboard in areas that was not more complicated than they already have to be. That means we want the top of the beadboard trim to not interfere with the bottom of the window nor the electrical plates to be set on the trim of the beadboard. This all leads to favoring a taller than standard wainscoting.

Before I move on to our to-do list, I wanted to share an image of how the finishes and materials will all work together. I love calacatta gold for its combination of warm and cool grains so that it pairs well with warm and cool colors. The warm brass accents feel right at home, while the charcoals in the wallpaper and the blue wall color also feel really good next to the stone. Now on to our list!
The Full To Do List
Demo Bathroom
Remove Pebble Dash from Walls
Reset plumbing to accommodate new fixtures and design
shift toilet waste pipe over 3”
Set electrical placement of overhead light fixture, wall sconce, plugs and switches
Remove existing window and swap with new
Create inset for medicine cabinet
Install insulation
Sheet rock walls and ceilings
Mount tongue and groove beadboard paneling
Set trim around window
Mud seams and smooth coat over sheet rock
Fill nail holes in beadboard
Prime walls & ceiling
Order paint
Finalize window treatments & order fabric
Install floor tiles
Install baseboards and trim
Paint paneling, trim & ceiling
Install medicine cabinet
Wallpaper above paneling
Modify vanity cabinet drawers to accommodate sink & plumbing
Install plumbing fixtures
Install countertop and backsplash
Install hardware fixtures - toilet paper holders, towel holders, etc.
Photograph room
After writing out this long to do list, I’m afraid I may have shot myself in the foot. We can’t control everything and with the Covid-19 shelter-in-place mandate, I am already seeing issues with getting the installers into the home for the floor tiles and countertop install. We may have to install the floors on our own, which I’m not excited about… Let’s hope this challenge keeps us accountable!


